How to Setup NJ with CJ1W-SCU42
The NSH5 does not have the option of variable exchange. But it is possible to use the NSH5 with a CJ1W-SCU42.
Principle of operation is to specify the SYSMAC variable to an equal address of the NSH5 variable.
Note: Consider the two variables ( NJ and NSH5) if there are changes made in one of them.
Intro of Steps
- Create a Project.
- CPU Configuration.
- CJ1W-SCU42 Parameter settings.
- Programming, Internal Variables.
- NSH5 Hand-held Programmable Terminal.
- Attachments.
This article (NJ501 base) explains how to setup the configuration for the NJ501 with a CJ1W-SCU42 Serial communication unit connecting to a NSH5 Hand-held Programmable Terminal.
All the samples used in this article are attached.
Program Versions; Sysmac Studio Version 1.0, CX-Server Version 5.0, CX-Designer Version 3.3
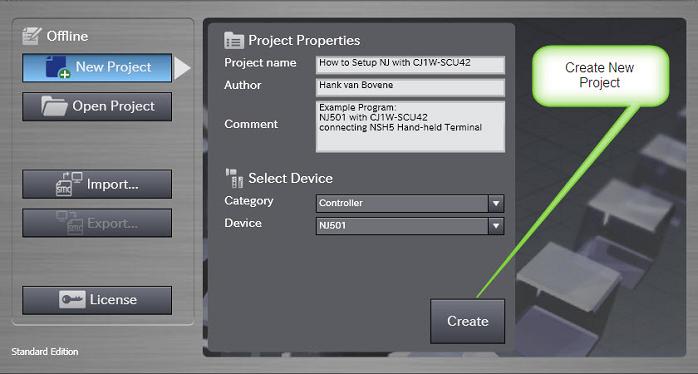
1. Create a Project
Create a New Project in Sysmac Studio.
2. CPU Configuration
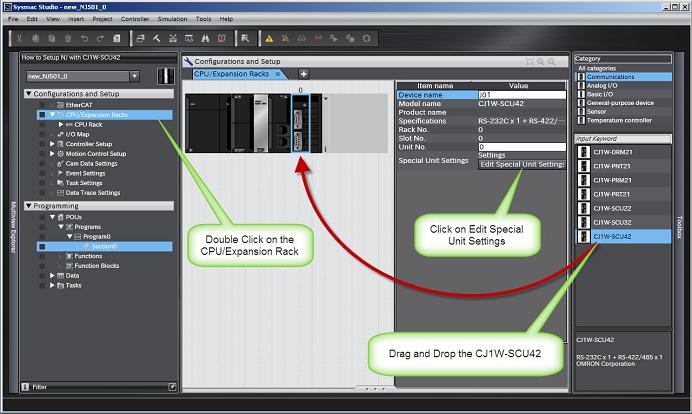
Double Click on the CPU/Expansion Rack.
Drag en Drop the CJ1W-SCU42.
Click on Edit Special Unit Settings.
3. CJ1W-SCU42 Parameter settings.
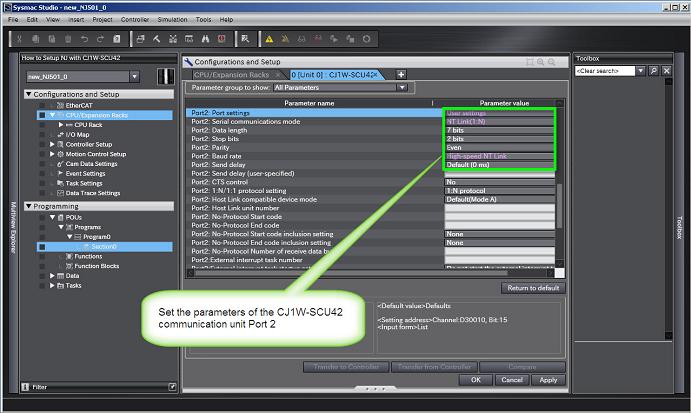
Set the parameters of the CJ1W-SCU42 communication unit Port 2.
: Port settings = User settings
: Serial communication mode = NT Link (1:N)
: Data length = 7 bits
: Stop bits = 2 bits
: Parity = Even
: Baud rate = High-Speed NT Link
4. Programming, Internal Variables.
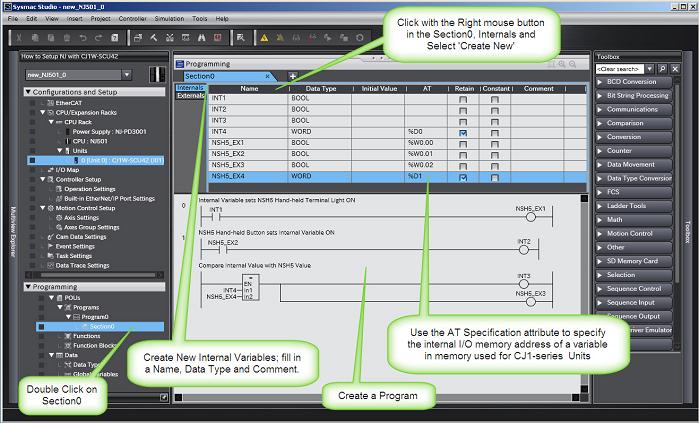
Detailed information in manual W501, section 6-3-8.
Data type will then be anything available format. Important is AT command is %D...%W
5. NSH5 Hand-held Programmable Terminal.
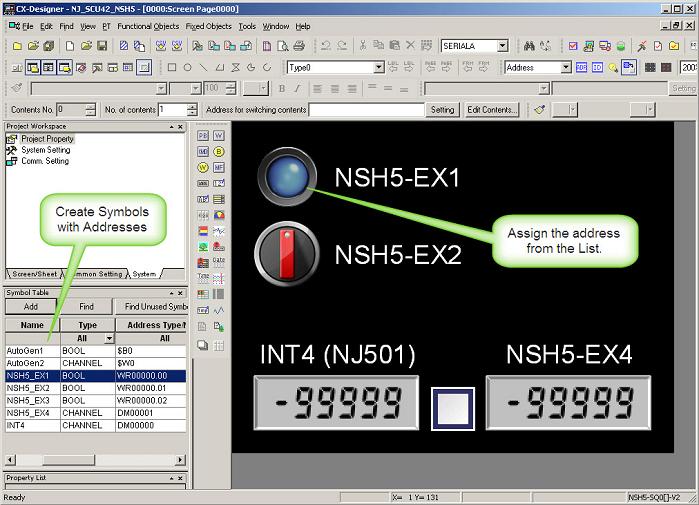
Create a Program for the NSH5 Hand-held Terminal and verify the communication settings with CX-Designer.
6. Attachments.
How to Setup NJ with CJ1W-SCU42.smc â–º Sysmac Studio file.
NJ_SCU42_NSH5.IPP â–º CX-Designer file.
Was this article helpful?
That’s Great!
Thank you for your feedback
Sorry! We couldn't be helpful
Thank you for your feedback
Feedback sent
We appreciate your effort and will try to fix the article