Introduction
| NJ-Controllers | NB-Terminals |
| NJ301-1100 | NB3Q-TW01B |
| NJ301-1200 | NB5Q-TW01B |
| NJ501-1300 | NB7W-TW01B |
| NJ501-1400 | NB10W-TW01B |
| NJ501-1500 | |
| NJ501-4300 | |
| NJ501-4400 | |
| NJ501-4500 |
NJ controller setup
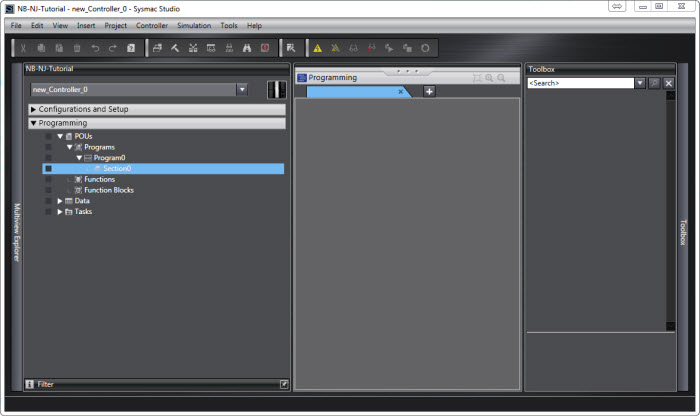
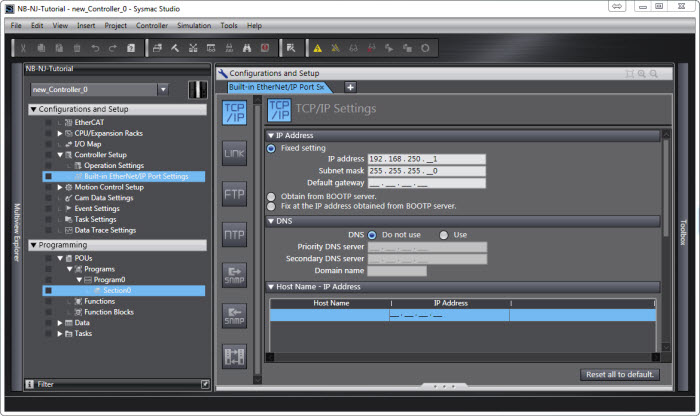
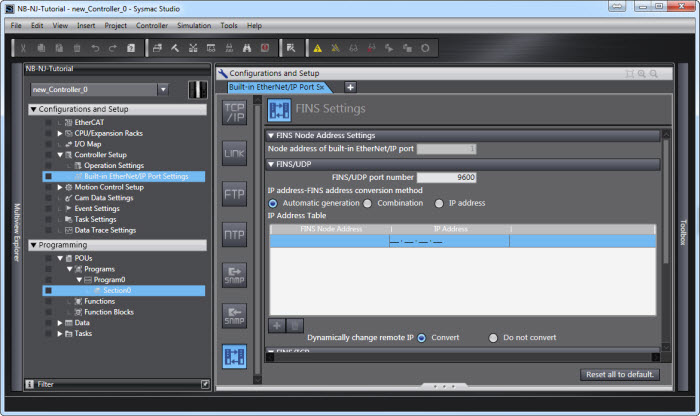
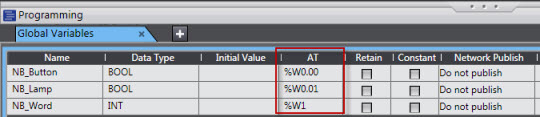
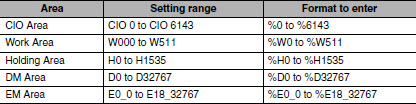
Add a % character to the beginning of the addresses in AT when specifying memory used for CJ-series Units. This is shown in the following table.
NB terminal setup
Step 1: Open a new project in NB-Designer.
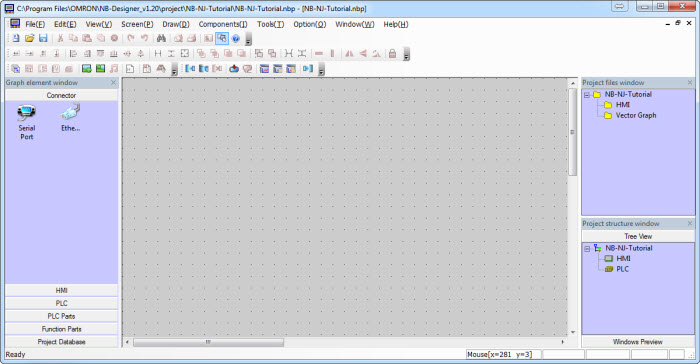
Step 2: Add a NB terminal with Ethernet connection. Add an OMRON CJ/CS Series Ethernet(UDP Slave).
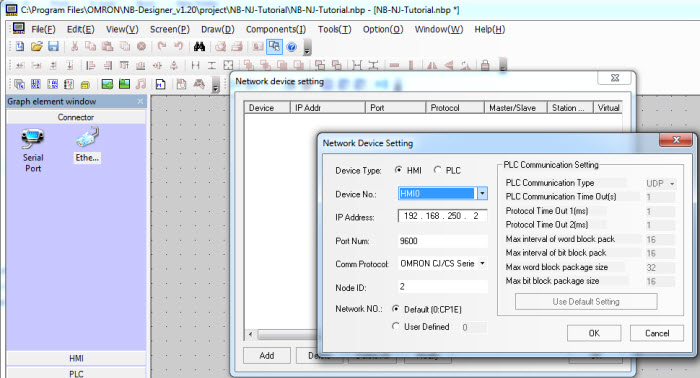
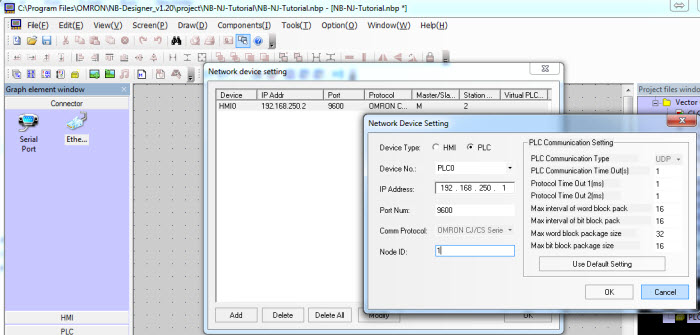
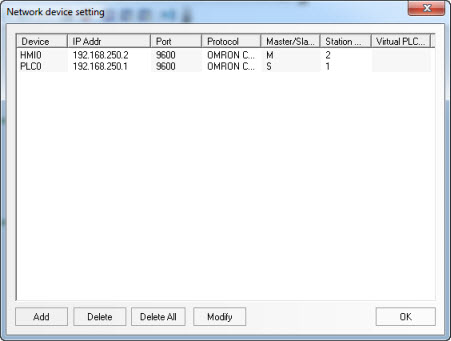
Now you have created the communication device list.
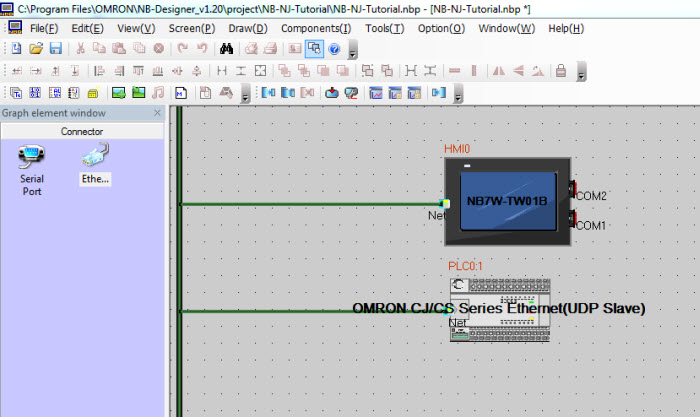
Step 3: Add an Ethernet connector between the PLC and HMI
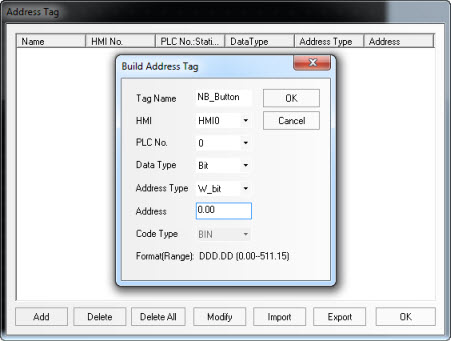
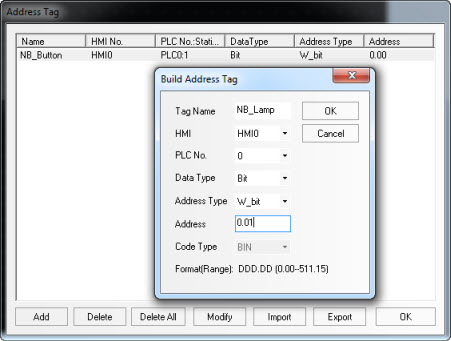
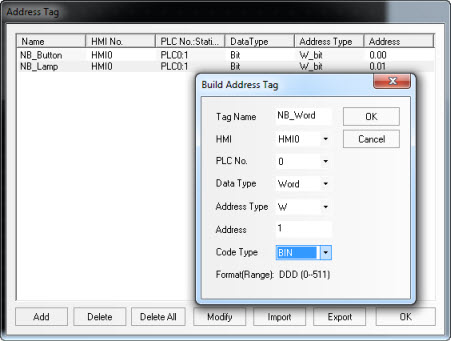
Step 4: Enter the variables that you want to use.
Button:
Lamp:
Word:
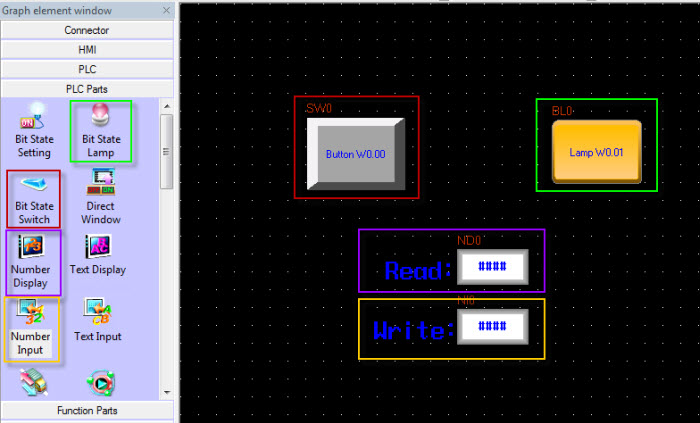
Step 5: Create your application in the NB terminal frames that you can find under the Project Structure window on the right.
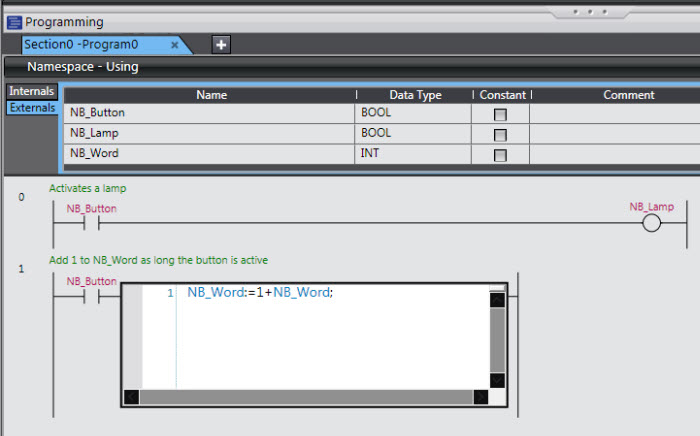
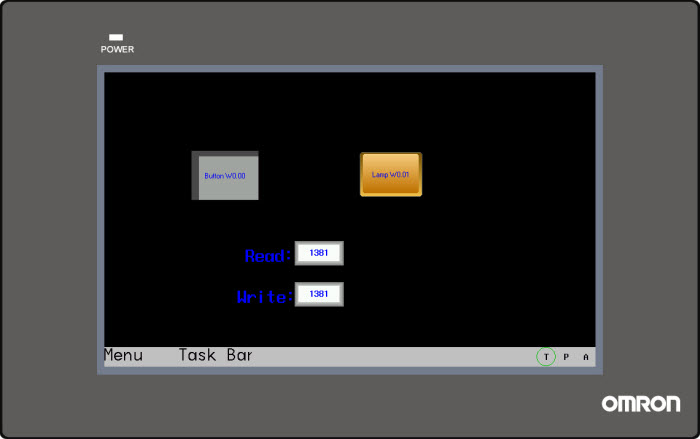
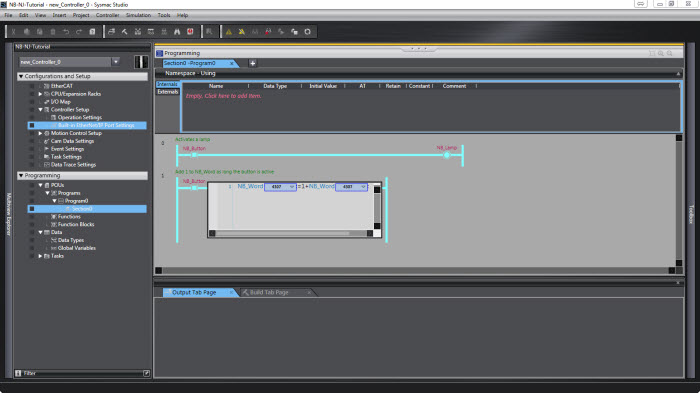
In this example we have one button that activates one lamp and also will add 1 to a word address as long it is active.
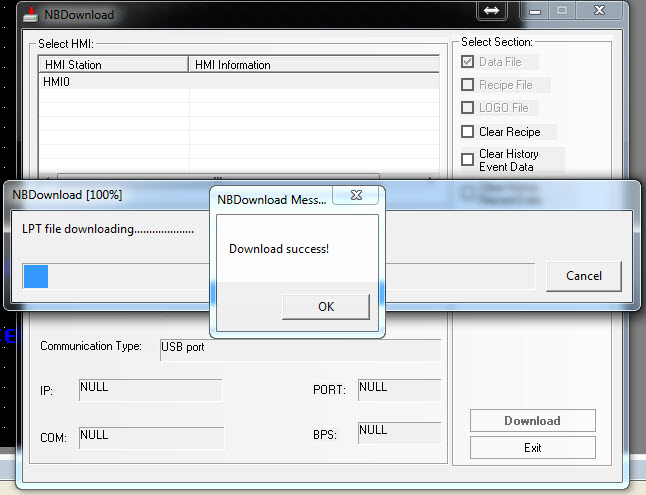
Step 6: Download your application to your NB terminal
Now the setup and programming are done. When the terminal is connected to the NJ controller it will read and display the values of the required variables
Was this article helpful?
That’s Great!
Thank you for your feedback
Sorry! We couldn't be helpful
Thank you for your feedback
Feedback sent
We appreciate your effort and will try to fix the article