Introduction
This tutorial is intended to give an overview of connecting CelciuXº to NS and using Smart Active Parts with the HMI.
| Components used: • EJ1N-TC__-__ • EJ1C-EDU_-NFLK • 24 Volt Supply • CJ1W-CIF11 • NS_ -T__ Serial or USB cable to program the HMI • E58-CIFQ1 for configuration of CelciuXº |
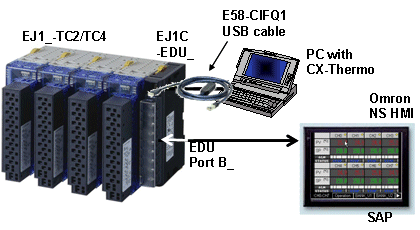 |
Procedure:
- Setting the CJ1W-CIF11: Set the dip switches as follows
SW2 Description 1 ON: Terminator connected. 2 ON: 2-wire method 3 ON: 2-wire method 4 Not used. 5 OFF: No RS control of RD (continual reception) 6 ON: RS control of SD - Connect the CJ1W-CIF11 (RS485 port) to the B port of the EDU.
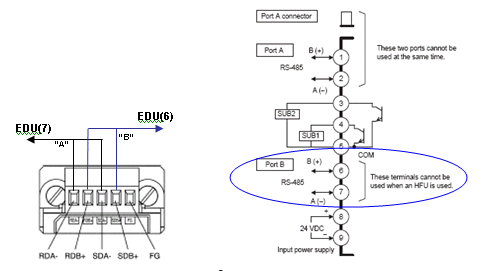
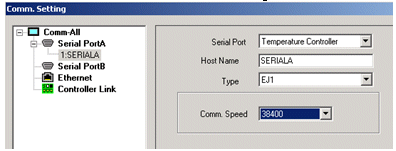
RDB+ __ B+; RDA- ___A-; 110Ω to 125 Ω 1/2W terminating resistor - Set NS Application Comms settings as (in CX Designer) NS version 6.6 of firmware; CX Designer V2.01 or above.
- Write the CX designer Application by including the appropriate SAPs
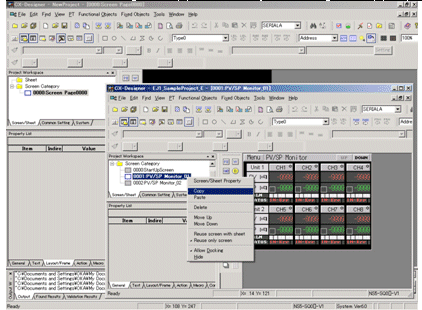
The current SAP library includes (Status Monitor, Settings, Faceplate and operation commands)
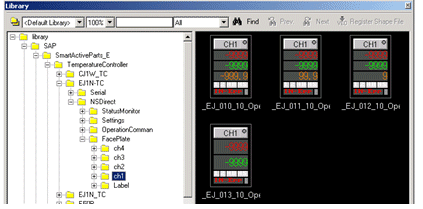
- Configure the Temperature Controllers with CX-Thermo.
- Download the application to the NS
- HMI can now be used for commissioning, operation and maintenance of the instruments.
Was this article helpful?
That’s Great!
Thank you for your feedback
Sorry! We couldn't be helpful
Thank you for your feedback
Feedback sent
We appreciate your effort and will try to fix the article