Introduction
This tutorial is intended to give you an overview of connecting CelciuXº to the PC using CX-Supervisor in order to monitor values.
| Components used: • EJ1N-TC__-__ • EJ1C-EDUA-NFLK • 24 Volt Supply • E58-CIFQ1 • CX-Supervisor v2.0 |
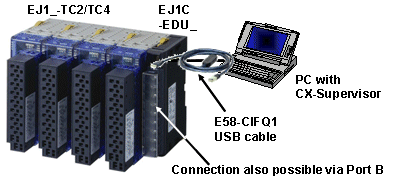 |
Procedure:
- Connect the CelciuXº using the procedure described in “Connection to CX Thermo via USB port”.
- Install CX-Supervisor v2.0 (this also installs the EJ1 CX-Server driver)
- Start CX-Supervisor developer and create a new project
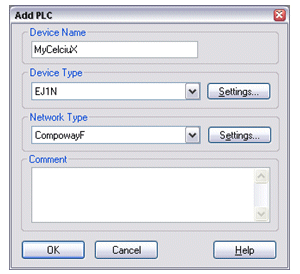
- Add a new device ( )for the EJ1
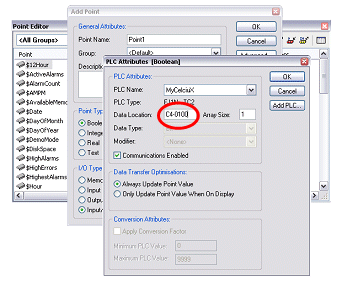
- Add points to the project ( ) for the EJ1. For definition of point addressing, see the help file under “Start | Programs | Omron | CX-Server | Drivers | EJ1 Driver help”
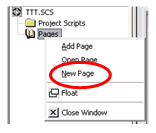
- To display the value, add a new page to your project:
- Then add a graphical control such as a rotational gauge:
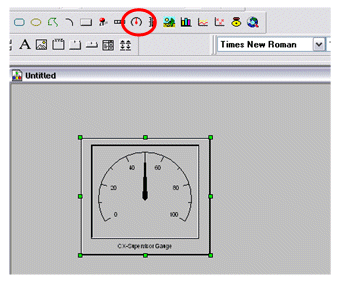
- The properties of this can be set to display your new point:
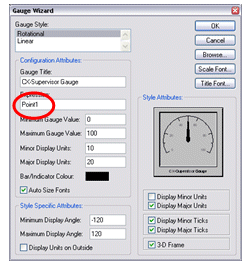
- Ensure your EJ1 is connected correctly and then run your project ( ). Please note, CX-Supervisor requires a USB dongle to be connected in order to run your project. These instructions are also applicable to the trial version of CX-Supervisor which does not require a dongle, but will only run for 30 days.
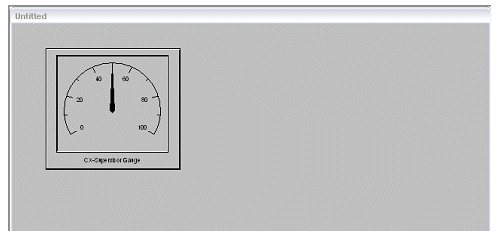
- You can now Read and Write parameters of the connected CelciuX temperature controller
Was this article helpful?
That’s Great!
Thank you for your feedback
Sorry! We couldn't be helpful
Thank you for your feedback
Feedback sent
We appreciate your effort and will try to fix the article