TABLE OF CONTENTS
1. Remarks
- To work with this document a basic knowledge about Sysmac and Sysmac Studio is required, please follow the Sysmac Basic and Sysmac Advanced training before.
- This Quick Start has been put together with great care but we can't guarantee the information is complete and correct
- In case of doubt look in the recommended manuals or datasheets
- In case you find any mistakes in this Quick Start, please let us know through helpdesk-bnl@omron.com
Software
Number of | Product code | Description | |
1 | SYSMAC-SE200D | Sysmac Studio Download after registration license code | |
1 | SYSMAC-SE201L | Sysmac Studio single license | |
Hardware
Number of | Product code | Description | |
1 | NJ501-1500 | All Sysmac CPU are possible | |
1 | NX102-1100 | All Sysmac CPU are possible | |
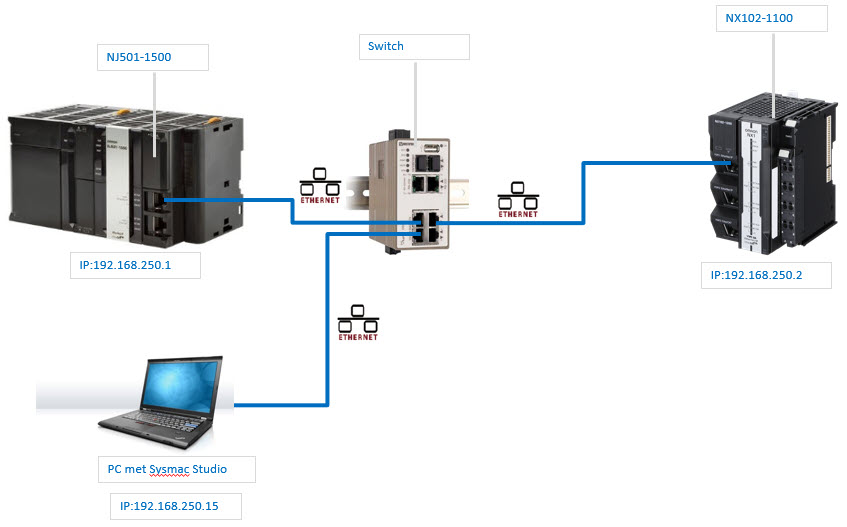
3 | Ethernet Cabel | All lengths <100m | |
1 | Switch | Industrial switch | |
Documentation
Code | Description | ||
| N/A |
2. Wiring
3. Setup Controllers
3a. NX102
- Open Sysmac Studio and create a new project
- Open Controller Setup in the Multiview Explorer
- Open Build-in Ethernet/IP Port Settings
- Select TCP/IP Settings
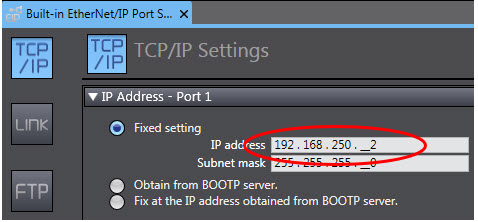
- Set the IP address to 192.168.250.2
- Open the Global Variables and create 2 variable and set the Network Publish:
- NX_EIP_Input: INT array [16] Network Publish: Input
- NX_EIP_Output: INT array [16] Network Publish: Output

Array’s, separate variable or structs are also allowed (as long as the data types are the same in both controllers)
- Go Online with the controller and Synchronize the project to put the variables into the controller
3b. NJ
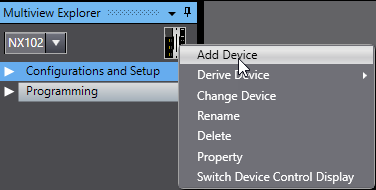
- Create with Add Device a NJ501-1500. It is also possible to use 2 separate projects, see further, the rest of the settings is the same
- Open Controller Setup in the Multiview Explorer
- Open Build-in Ethernet/IP Port Settings
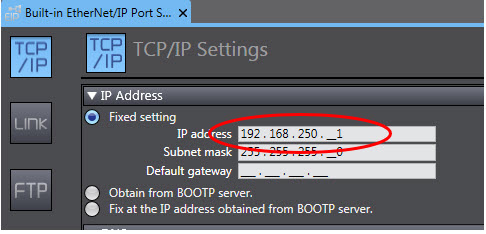
- Select TCP/IP Settings
- Set the IP address to 192.168.250.1
- Open the Global Variables and create 2 variable and set the Network Publish:
- NJ_EIP_Input: INT array [16] Network Publish: Input
- NJ_EIP_Output: INT array [16] Network Publish: Output

- Array’s, seperate variable or structs are also allowed (as long as the datatypes are the same in both controllers)
- Go Online with the controller and Synchronize the project to put the variables into the controller
3c. Both Controllers
3c1. NX102
- Open in the menu Tools – Ethernet/IP Connection Settings
- Doubleclick the correct port (in this example Port 1)

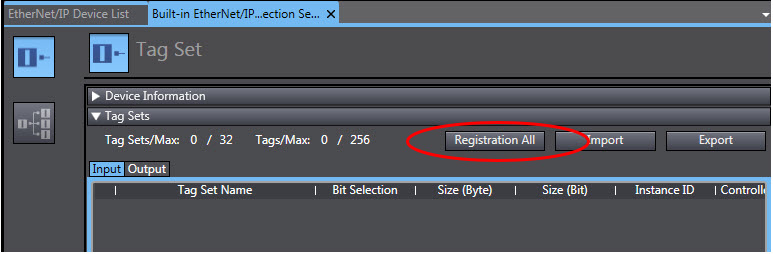
- Tag Set, click Registration All
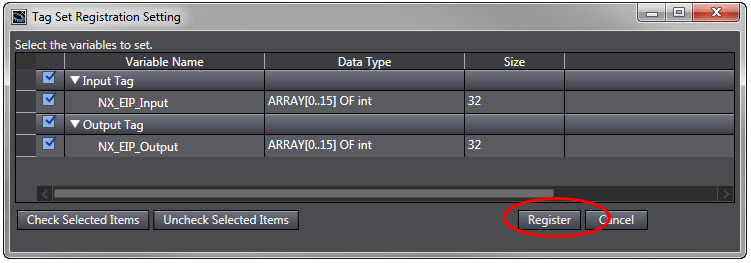
- Select the variables and click Register
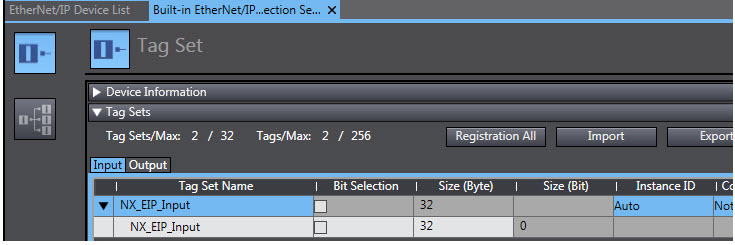
- The variables are now registered
3c2. NJ5
- Open in the menu Tools – Ethernet/IP Connection Settings
- Doubleclick the Build-in Ethernet/IP Port Settings

- Tag Set, click Registration All
- Select the variables and click Register
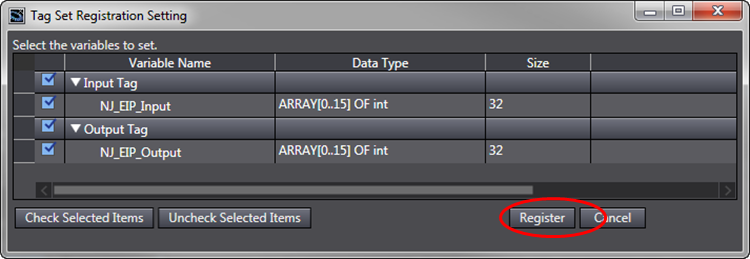
- The variables are now registered
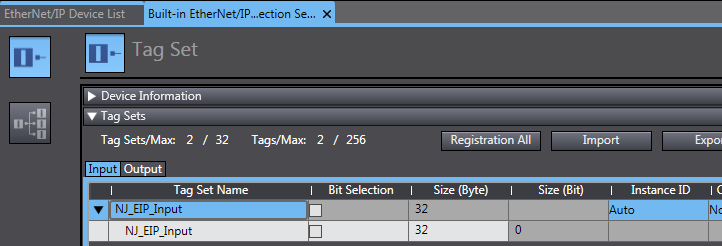
3c3. Setup Ethernet/IP Connection Settings NX102
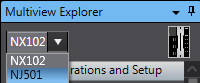
- Open the NX102
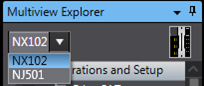
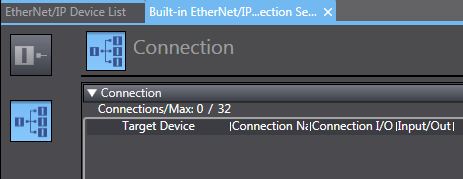
- Open Tools - Ethernet/IP Connection Settings
- Select the correct port (in this example port 1)
- Select the button for Connection
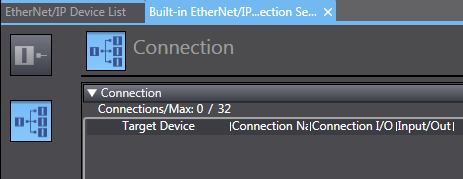
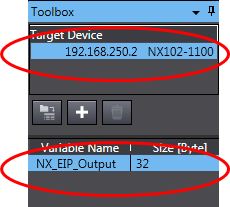
- Select the NJ501 from the toolbox (as it is in the same project)
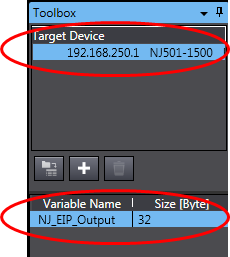
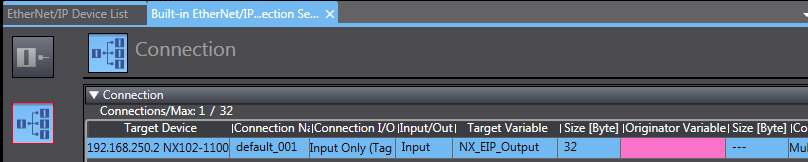
- Select the Variable from the Variable Name list and drag and drop it in the Connection list

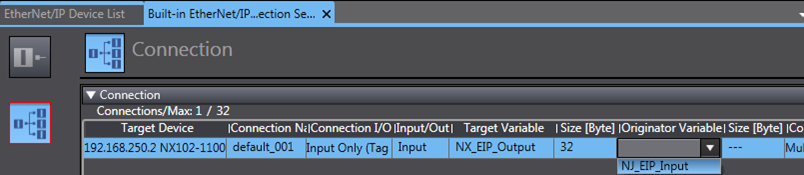
- Select in the column Originator Variable the Local Variable (NX_EIP_Input)
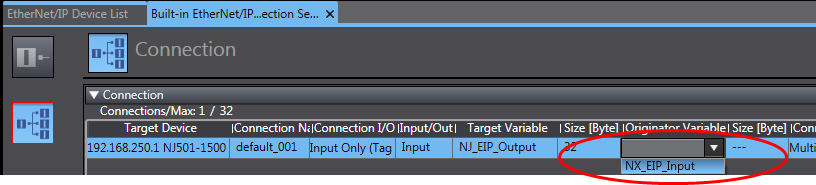
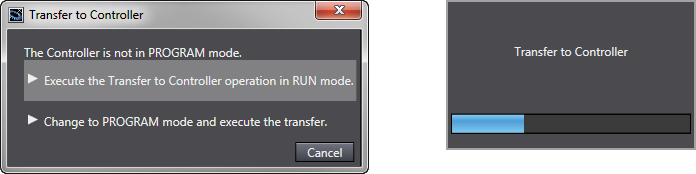
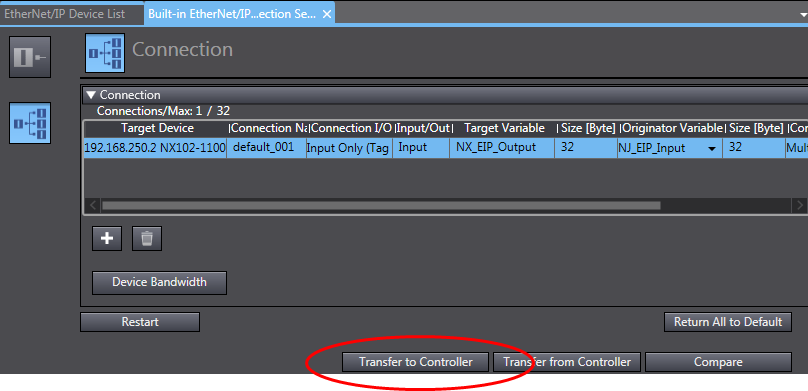
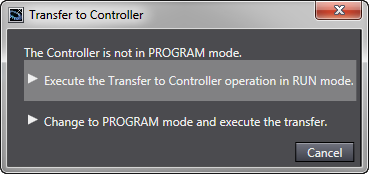
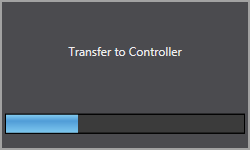
- Go Online with the controller and select Transfer to Controller
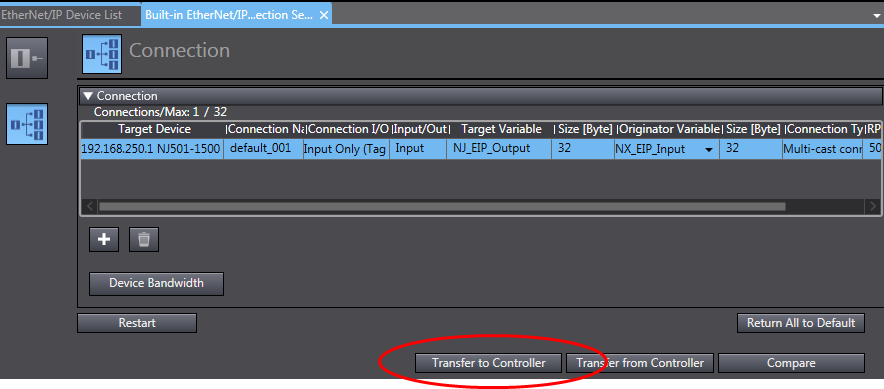
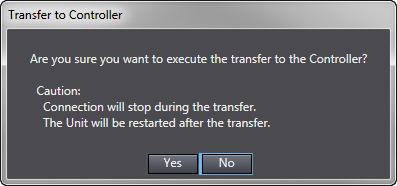
- Select yes to transfer
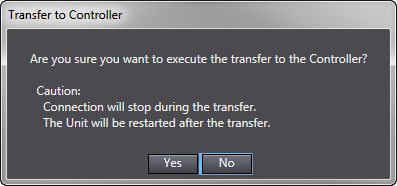
- Select Transfer Mode
3c4. Setup Ethernet/IP Connection Settings NJ501
- Do the same for the NJ501
4. Monitoring
It is possible to monitor the connection
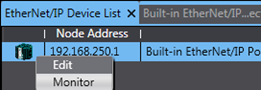
- Open Tools - Ethernet/IP Connection Settings
- With a right mouse click on the port and select Monitor
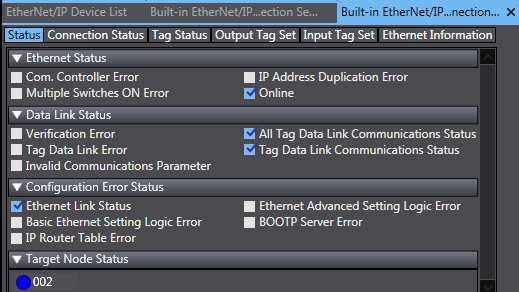
- A monitoring window will be opened
5. Using 2 different project
It is possible to use 2 separate projects.
The steps 3C1 / 3C2 need to be done for both projects (Tag sets need to be defined)
In the Toolbox there is a button to import from a different project
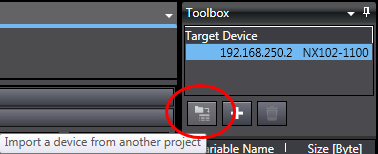 After this the same steps as in 3C3 and 3C4 need to be done
Was this article helpful?
That’s Great!
Thank you for your feedback
Sorry! We couldn't be helpful
Thank you for your feedback
Feedback sent
We appreciate your effort and will try to fix the article